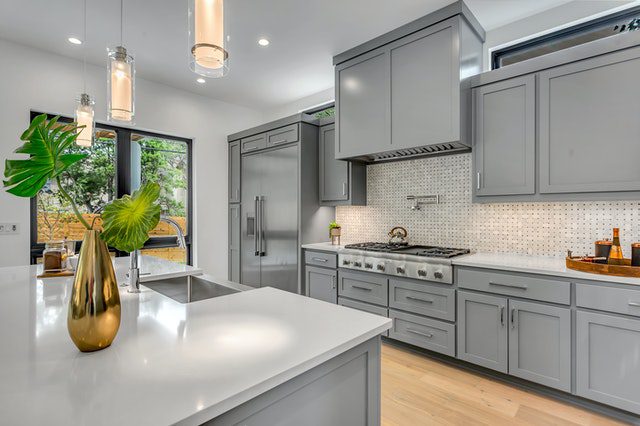
Bold kitchens are all the rage right now. Homeowners are installing chic stainless steel appliances, dramatic lighting fixtures, and the big one: painted and stained cabinets. Sure, you can order new cabinetry and shell out a large chunk of cash, but why not take a shot at revamping your current cabinets? By painting and staining kitchen cabinets on your own, you can achieve the bold look you’re going for and save your money for a fancy blender or pressure cooker. Staining kitchen cabinets can help you achieve the look you’ve always dreamed of at an affordable price! Painting and staining may seem like a daunting task, but Reno Paint Mart can provide all the materials and knowledge you’ll need to get the job done and show it off at your next dinner party.

How to Paint Kitchen Cabinets
#1 Remove Cabinet Doors, Drawers, and Hardware
In order to properly paint your kitchen cabinets, start by removing all the cabinet doors, drawers and hardware so that you can easily reach all surface areas with your paint brush or roller. Knobs, screws and hinges can get in the way and make painting much more difficult, but removing them creates a more flat surface with easier maneuverability. Also be sure to keep the small pieces, such as the hinges, screws, pulls, and latches, in a plastic bag or other container so you don’t lose any important pieces. Lastly, label any special pieces such as smaller cabinet doors, so that you can easily replace them once they’re done being painted.
#2 Clean All Surfaces
Before painting your cabinets, thoroughly clean them with a 50/50 solution of water and detergent and a clean microfiber cloth. Alternatively, you can also use an all-purpose cleaner or a 50/50 solution of water and vinegar. Even if your cabinets don’t look dirty at a glance, they more than likely have oils and dirt built-up that can affect the look and feel of your cabinets. This additional build-up of gunk and grime can also prevent paint from properly adhering to the surface and potentially create bumps in your surface.
#3 Repair Any Holes or Dents
If your cabinets have holes or dents in them, you should tend to them with wood filler prior to painting. This will help smooth the surface, and allows for a more even application of paint. Next, wipe away any excess product and wait until dry before moving on to the next steps.
#4 Sand All Surfaces
Now that your kitchen cabinets are clean and free of holes and dents, it’s time to sand the surfaces. Be sure to sand any rough edges, and smooth any protruding areas that were filled. This will help the primer and paint go on smoother and will provide full coverage. We recommend using a 120-grit sandpaper or sanding sponge to avoid rounding out the edges. Also be wary of sanding too much. The idea here is to create a smooth surface for easy paint application, not to completely strip the surface.
Once you’ve finished sanding the surfaces, be sure to clean them with a wet microfiber cloth and then wipe dry.
#5 Apply Primer
When learning how to paint kitchen cabinets, always remember to apply a base coat of primer. Primer helps hide imperfections and limits the amount of paint coats that are needed to fully cover the surface. Also, primer can help the paint adhere to the surface, and it increases the durability of the paint. You should only need to apply one coat of primer. Just be sure to apply it carefully and thinly over the cabinet’s surface. Primer that is applied heavily can create lines and bumps in your final product.
#6 Apply the Paint Finish of Your Choice
There are several types of interior house paints you can use to paint your kitchen cabinets. Whether it’s a flat, eggshell, satin, semi-gloss, or high-gloss finish, we have the interior paints in stock to bring your vision to life. Kitchen cabinets are commonly prone to getting dirty and stained due to their location, so consider a finish that’s easy to clean when you’re shopping around.
#7 Attach Cabinet Hardware and Doors
Now that you’ve painted all the kitchen cabinet surfaces, it’s time to reattach your doors, drawers, and hardware to piece together the finished look. Before you attach any of the hardware, make sure that all cabinet surfaces are completely dry. Next, pre-drill any holes you may need to attach new hardware, or reattach your old hardware using the marks already made in your cabinets. Once all this is finished, your kitchen will look brand new and revived, allowing you to enjoy it in a new light! Pat yourself on the back, and show off the finished result to your friends at the next dinner party.
How to Stain Kitchen Cabinets
The process of staining cabinets is similar to painting, with a few minor differences. If you have ever taken a stab at staining furniture, you’ll have a leg up. It’s all in the preparation. The more effort put into laying the groundwork, the better the finished result will be.

#1 Choose Your Stain!
Before diving into the muscle work, decide on a type and color of stain for your kitchen cabinets. Take a step back and think: do you want a darker stain for a warmer look, or a lighter stain for a more open, airy look? Some woods don’t require a stain at all since they are beautiful in their natural state. If you have cherry, mahogany, or walnut cabinets, consider ditching the stain and opt for just a clear coat. For everyone else, there are several types of stains to chose from. From oil-based, to water-based, to gel-based, to stain/sealer combos, you’ll want to hone in the optimal one for your type of wood and desired outcome. Reno Paint Mart can help you decide which one best suits your project.
#2 Remove Cabinet Doors, Drawers, and Hardware
Just like with paining, start by removing all the cabinet doors, drawers and hardware. Unscrew knobs, pulls, and hinges, and label them in baggies so that you can reinstall them later. As an alternative, you can place masking tape on hinges to protect them from the stain. It never hurts to snap a few pictures that you can reference upon reinstallation.
#3 Clean All Surfaces
Staining wood requires a clean, blank slate. Start by wiping the wood with trisodium phosphate (TSP) solution. Typically, it comes in a powder form that you’ll need to dilute accordingly with water. TSP is known for it’s ability to de-gloss old surfaces, and will go beyond what you can scrub off with a household cleaning agent. It also ensures a surface free of impurities for the staining job ahead.
#4 Start Sanding
Whether you plan to use elbow grease alone, or are enlisting the aid of an electric sander, the aim with sanding is to remove the old finish and smooth out any knicks or imperfections. Start with a medium grit sandpaper, then move on to finer grit to eliminate any “pigtails” or scuffs. Always sand with the grain. This process will be tedious, but take breaks, stick with it, and you’ll marvel at your handiwork. If you have an air compressor, leaf blower, or shop vac, use it to blow off sawdust from all the nooks and crannies on each cabinet face. Follow up with a clean microfiber rag and let it all dry.
#5 Apply Sealer
Sealers, or pre-stain conditioners, are a vital but often overlooked step. These compounds ensure wood surfaces absorb stain evenly and avoid blotching. Apply two thin coats and follow the directions on the can. Let the sealer absorb and then lightly sand the surfaces in the direction of the grain. Wipe with a clean microfiber cloth.
#6 Begin Staining
The method in which you apply stain will depend on the type you choose, but can either be done with a cloth or paintbrush. Don’t shake the can! Instead, mix the stain by moving a stir stick in a figure eight pattern. Evenly coat all wood surfaces with stain and wipe off excess as you go. Luckily, you applied pre-stain conditioner, so blotching won’t be as much of a worry, but you should still make sure their are no areas left puddling. Lightly sand between coats as necessary.
#7 Apply Desired Finish
Once you’re satisfied with the color and coats of stain, it’s recommended to apply a finishing agent. Polyurethane sealer or clear varnishes add an extra layer of protection and shine. This is especially great for the cabinet faces that are located under the sink, as they will see water and soap dripped on them in the years to come. Follow the directions on the can for application method and drying times.
#8 Reinstall & Crack Favorite Beverage
Referencing the pictures and labeled hardware baggies you prepped prior, carefully reinstall the cabinet faces. Watch your new vision come to life with each face, and revel in your hard work!

Get Your Paint Supplies from Reno Paint Mart
Now’s the perfect time to bring new life to your kitchen with a fresh coat of paint or stain! Reno Paint Mart has all the paint and wood staining materials you’ll need to refinish your kitchen cabinets. Visit one of our locations – Reno, Carson City, and Truckee – today to get started on your next project! We also offer helpful advice and tips from design professionals, just ask to speak with one of our design experts at the Reno Design Center. Connect with us today to learn more about our products and services!